
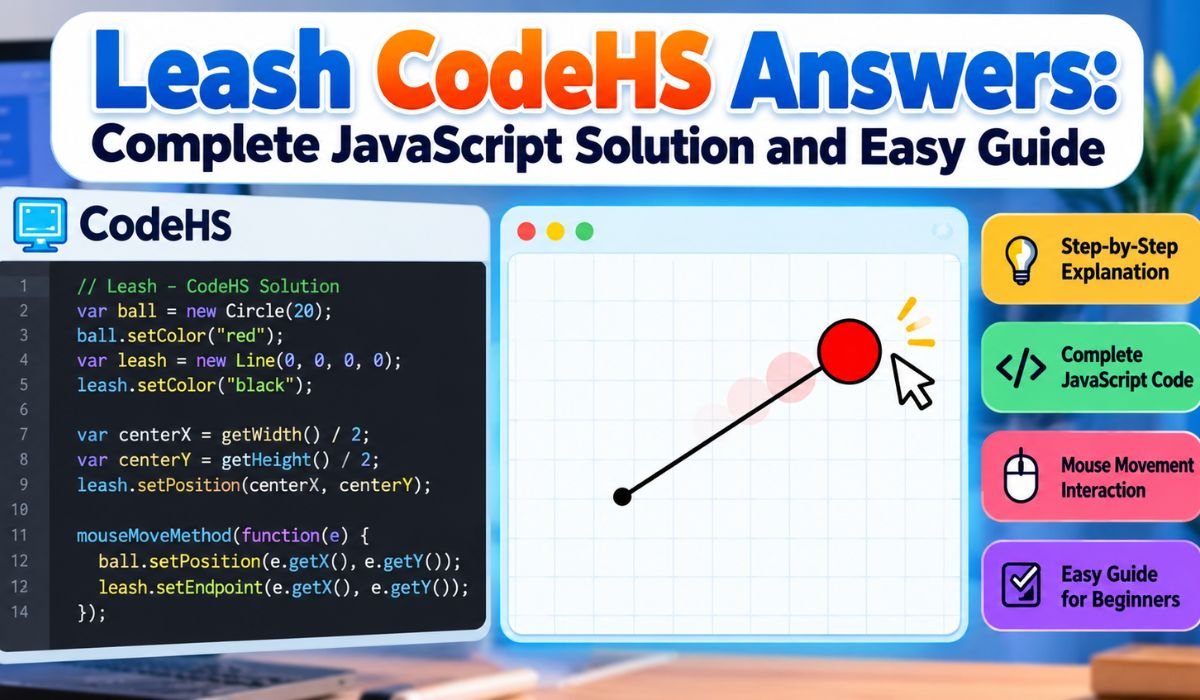
Leash CodeHS Answers can make a confusing JavaScript graphics assignment much easier to understand. If you’ve been trying to make a ball follow your mouse while keeping it connected to a line, you’re working with one of the fundamental ideas behind interactive programming. The task might seem tricky at first, but the solution is surprisingly simple once you understand how the objects communicate through coordinates.
The Leash exercise introduces students to several essential JavaScript concepts, including mouse events, graphical objects, callback functions, and coordinate-based movement. Rather than creating a new ball whenever the cursor moves, the program updates an existing Circle and adjusts the endpoint of a Line. The result is a smooth, interactive effect that responds directly to the user’s movements.
In this guide, we’ll explore the complete Leash CodeHS JavaScript solution, explain how each part works, and look at the mistakes that commonly prevent students from getting the expected results. You’ll also learn how to test your program, improve your coding habits, and apply these skills to future graphics projects.
Quick Information About Leash CodeHS
The following reference provides a quick overview of the JavaScript graphics example discussed in this guide.
| Information | Details |
|---|---|
| Platform | CodeHS |
| Exercise Name | Leash |
| Programming Language | JavaScript |
| Exercise Category | Interactive Graphics |
| Difficulty Level | Beginner |
| Main Graphics Object | Circle |
| Connecting Object | Line |
| Example Ball Radius | 30 Pixels |
| Initial Ball Position | Canvas Center |
| Fixed Leash Position | Canvas Center |
| Moving Endpoint | Mouse Position |
| Mouse Event Method | mouseMoveMethod() |
| Movement Function | moveLeash() |
| Ball Position Method | setPosition() |
| Line Endpoint Method | setEndpoint() |
| Mouse X Coordinate | e.getX() |
| Mouse Y Coordinate | e.getY() |
| Initialization Function | start() |
These details describe the example solution. Your individual CodeHS assignment may include different requirements.
What Is the Leash Exercise in CodeHS?
The Leash exercise is a beginner-level JavaScript graphics activity found in certain CodeHS courses. It introduces students to interactive programming by asking them to create graphical objects that respond to mouse movement.
The idea is straightforward. A ball appears in the center of the graphics canvas, connected to a line that acts as its leash. When the user moves the mouse, the ball follows the cursor. Meanwhile, the line stretches from its original starting point to the ball’s new position.
What makes the exercise interesting is that the two objects behave differently. The ball moves freely, but one end of the leash never leaves the center of the canvas.
This interaction demonstrates event-driven programming, where the program responds to something the user does. It’s the same general principle behind many interactive websites, drawing applications, and simple browser games.
Understanding the Leash CodeHS Assignment Requirements
Before jumping into the code, it helps to picture exactly what the finished program should do.
At the beginning, the ball should sit in the middle of the graphics canvas. The leash also begins there, with both endpoints sharing the same coordinates. Because the line initially has no length, it might not be visible until the mouse moves.
As soon as the cursor changes position, the ball should follow it. The movable end of the leash must travel to that same location, keeping the line visually connected to the ball.
The other endpoint stays fixed at the canvas center throughout the program.
That fixed-point relationship is the most important requirement. If both ends of the line move, or if the ball and endpoint use different coordinates, the result won’t match the intended behavior.
Keep in mind that CodeHS courses can have different exercise numbers, starter code, and grading requirements. Always check the instructions in your own assignment before submitting a solution.
Complete Leash CodeHS Answers: JavaScript Solution
The following example demonstrates the core JavaScript graphics logic needed for the Leash exercise.
var BALL_RADIUS = 30;
var ball;
var leash;

function start() {
    var centerX = getWidth() / 2;
    var centerY = getHeight() / 2;

    leash = new Line(centerX, centerY, centerX, centerY);
    add(leash);

    ball = new Circle(BALL_RADIUS);
    ball.setPosition(centerX, centerY);
    ball.setColor(Color.yellow);
    add(ball);

    mouseMoveMethod(moveLeash);
}

function moveLeash(e) {
    var mouseX = e.getX();
    var mouseY = e.getY();

    leash.setEndpoint(mouseX, mouseY);
    ball.setPosition(mouseX, mouseY);
}
The program begins by creating a Line and a Circle at the center of the canvas. It then registers a mouse movement function that updates both objects whenever the cursor changes position.
Notice that the objects are created only once. The movement function doesn’t draw a new ball or line. Instead, it changes the positions of the existing objects.
This keeps the program organized and prevents unnecessary shapes from accumulating on the canvas.
The example demonstrates the behavior described in the Leash graphics exercise. However, individual CodeHS assignments may require different names, colors, dimensions, or additional instructions.
Step-by-Step Explanation of the Leash JavaScript Code
The first statement defines BALL_RADIUS and gives it a value of 30. This means the Circle will have a radius of 30 pixels. Keeping the radius in a variable makes it easier to adjust the ball’s size later.
Next, the program calculates the center of the graphics canvas using getWidth() / 2 and getHeight() / 2. This is more reliable than entering fixed coordinates because the calculation adapts to the canvas dimensions.
The Line constructor then creates the leash. Its starting and ending coordinates are initially identical, placing both endpoints in the center.
After that, the program creates the ball using new Circle(BALL_RADIUS). The setPosition() method places it at the center, while setColor(Color.yellow) gives it a yellow appearance.
The final statement inside start() is mouseMoveMethod(moveLeash). This tells CodeHS which function should respond when the mouse moves.
Once the program is running, the moveLeash() function reads the cursor’s coordinates and sends them to both the ball and the line endpoint. Because the two objects receive matching coordinates, they stay connected.
How Mouse Movement Works in CodeHS JavaScript
Mouse movement is what brings the Leash program to life. Without it, the ball and line would simply remain in their starting positions.
CodeHS provides mouseMoveMethod() to register a callback function. A callback is a function that runs in response to a particular event, such as moving the mouse.
When the cursor moves inside the graphics canvas, CodeHS calls the registered function and provides an event object. In this example, that object is named e.
The program uses e.getX() to find the cursor’s horizontal position and e.getY() to find its vertical position.
Imagine moving the mouse to coordinates (280, 160). The program reads those values, moves the ball to that position, and adjusts the leash endpoint to match.
One small coding detail can make a big difference. The correct registration is:
mouseMoveMethod(moveLeash);It shouldn’t be written as:
mouseMoveMethod(moveLeash());The first version passes the function itself so CodeHS can call it later. The second attempts to execute the function immediately and passes its return value instead.
Understanding this distinction will help you with many other JavaScript event-handling exercises.
Understanding Circle and Line Objects in CodeHS
The Leash exercise relies on two graphics objects, and each has a specific role.
The Circle represents the ball. It’s created with new Circle(radius), where the radius determines its size. In CodeHS graphics, a Circle’s position refers to its center rather than its upper-left corner.
That detail is useful because the ball can move directly to the mouse coordinates. There’s no need to subtract the radius or make additional positioning adjustments.
The Line represents the leash. It’s created using new Line(x1, y1, x2, y2), with the first coordinate pair defining its starting point and the second defining its endpoint.
The two objects also use different movement methods.
For the Circle, setPosition() changes the location of its center. For the Line, setEndpoint() changes its ending coordinates while preserving the starting point.
This difference is essential. In the documented CodeHS graphics interface, using setPosition() on a Line changes its starting point, which would interfere with the fixed anchor required by the Leash exercise.
How to Run and Test the Leash Program in CodeHS
Writing the code is only part of the assignment. You also need to make sure it behaves correctly.
Begin by opening the Leash exercise in your CodeHS course. Read the instructions carefully and check whether any starter code has already been provided.
After entering your solution, run the program using the available execution controls.
At first, you should see the ball positioned in the center of the canvas. The leash may be difficult to notice because both endpoints begin at exactly the same location.
Now move your mouse across the graphics area. The ball should follow the cursor, and the leash should stretch from the center toward the ball.
Try moving horizontally, vertically, and diagonally. It’s also worth moving toward all four corners of the canvas.
These tests help reveal coordinate mistakes that might not be obvious during limited movement. For instance, a program that updates the X coordinate but forgets the Y coordinate may appear correct when the mouse moves sideways.
A successful visual test confirms that the program behaves as intended. However, automated CodeHS grading may also check assignment-specific details.
Common Leash CodeHS Errors and How to Fix Them
Even a short JavaScript program can produce frustrating errors, especially when you’re still getting comfortable with graphics methods.
If the ball doesn’t move, start by checking the mouse event handler. Make sure mouseMoveMethod() references the correct function and that the function name matches its declaration.
When the ball moves but the leash stays still, the problem is often inside the movement function. Check whether leash.setEndpoint() receives the current mouse coordinates.
Sometimes the entire line moves instead of stretching from the center. This can happen when the program changes the line’s starting point rather than its endpoint.
Another common issue is the appearance of multiple circles. If you’re creating a new Circle every time the mouse moves, those objects may remain visible. The solution is to create the ball once and update its existing position.
If nothing appears on the canvas, check that both objects have been added using add().
Don’t overlook ordinary JavaScript syntax errors, either. Incorrect capitalization, missing parentheses, mismatched braces, and misspelled variable names can all prevent the program from running.
The easiest way to troubleshoot is to identify exactly which part isn’t behaving correctly before making changes.
Why Does the Leash Line Appear Over the Ball?
You might finish the movement logic and discover that the leash is drawn across the front of the ball. Although this looks unusual, it doesn’t necessarily mean your coordinates are wrong.
The problem may simply involve drawing order.
When graphical objects overlap, their display order affects which object appears in front. In the basic Leash solution, the line is added before the ball.
add(leash);
add(ball);
With this arrangement, the ball normally appears above the leash.
If you reverse the order, the line may be drawn across the circle instead.
For this exercise, adding the leash first is a simple and practical solution. More advanced graphics projects may use layering controls to manage overlapping objects.
Understanding Coordinates in the Leash Exercise
Every graphical object on a canvas has a position defined by coordinates. Once you understand how those coordinates work, the Leash exercise becomes much easier to follow.
The X coordinate controls horizontal positioning, while the Y coordinate controls vertical positioning.
In the CodeHS graphics canvas, X values increase toward the right and Y values increase downward.
Suppose the canvas is 400 pixels wide and 500 pixels high. Dividing those dimensions by two gives a center point of (200, 250).
Now imagine moving the mouse to (320, 180). The ball moves to that location, and the leash connects the original center (200, 250) to the new position (320, 180).
The starting point remains unchanged.
There’s another useful detail here. The line’s endpoint is attached to the center of the Circle rather than its outer edge. Since the ball appears above the line, the leash looks as though it disappears underneath the ball.
This shared-coordinate relationship is what makes the entire visual effect work.
Why Should You Create the Ball and Leash Only Once?
A common beginner mistake is assuming that movement requires drawing a new object every time something changes.
In reality, CodeHS graphics objects can be updated after they’re created.
If you repeatedly create new circles inside the mouse event handler, the canvas may gradually fill with unwanted shapes. Creating new lines during every movement can cause similar problems.
The better approach is to create the Circle and Line inside start() and store references to them in variables.
In the example, ball and leash are declared outside the functions so both start() and moveLeash() can access them.
This introduces variable scope, which determines where a variable can be used in a program.
By keeping references to the original objects, the movement function can update their positions without rebuilding the graphics scene.
The result is simpler code that’s easier to maintain and debug.
Difference Between 9.7.4 Leash and 4.7.4 Leash CodeHS
While searching for Leash CodeHS Answers, you may come across references to both 9.7.4 Leash and 4.7.4 Leash.
These different numbers can reflect variations in course organization or lesson arrangements.
CodeHS offers multiple programming courses and environments, so the exercise number alone isn’t enough to confirm that two assignments are identical.
Instead, compare the actual instructions.
If your exercise asks you to create a ball that follows the mouse while remaining connected to a line anchored at the canvas center, the JavaScript graphics example in this guide demonstrates the relevant behavior.
However, your course might specify particular object sizes, colors, function names, or starter-code requirements.
Checking those details before submission is always worthwhile.
Tips to Improve Your Leash CodeHS JavaScript Program
Once your Leash program works, it’s worth spending a little time improving the way the code is organized.
Start with meaningful variable names. Names such as ball, leash, centerX, and centerY make the purpose of each value immediately clear.
Keeping initialization separate from movement is another useful habit. The start() function handles object creation, while moveLeash() responds to mouse events.
You should also avoid repeating calculations unnecessarily. In this example, the canvas center is calculated once because the program assumes the canvas dimensions remain unchanged.
After completing the assignment requirements, try experimenting with the Circle’s color or radius. Small changes like these can help you become more comfortable with graphics properties.
Most importantly, test your program after making changes. Frequent testing makes it easier to identify mistakes before they become difficult to trace.
What Programming Skills Does the Leash Exercise Teach?
The Leash exercise may only require a few lines of JavaScript, but the concepts behind it appear in much larger applications.
One of the most important is event-driven programming. Rather than repeatedly checking the mouse position through a manually written loop, the program waits for mouse movement and responds when it happens.
The exercise also teaches object state. The ball remains the same Circle object even as its position changes.
Coordinate-based movement is another essential skill. By working with X and Y values, students learn how programs control the positions of graphical objects.
Finally, the Leash activity demonstrates synchronization. The Circle and Line are separate objects, but they appear connected because the program updates them using the same coordinates.
These ideas form a useful foundation for browser games, drawing tools, draggable interfaces, and more advanced interactive JavaScript projects.
Final Thoughts
Finding the right Leash CodeHS Answers is helpful, but understanding how the program works is what makes the exercise valuable.
At its heart, the solution depends on a simple relationship. The ball follows the mouse, the line’s endpoint follows the ball, and the line’s starting point remains fixed at the center of the canvas.
Once you understand that relationship, the JavaScript becomes much easier to read. The program creates two graphical objects, registers a mouse movement callback, and updates their positions without creating unnecessary new shapes.
The Leash exercise also introduces programming skills that will remain useful long after you’ve completed the assignment. Event handling, variable scope, object positioning, and coordinate-based movement are all important parts of building interactive applications.
Rather than simply copying the solution, spend a little time experimenting with the code and observing how each change affects the result. That practical understanding will make future CodeHS JavaScript graphics exercises much easier to approach.
FAQs About Leash CodeHS Answers
What Is the Answer to the Leash Exercise in CodeHS?
The Leash exercise uses a Circle and a Line to create an interactive graphics program. Both objects begin at the center of the canvas. When the mouse moves, a callback function updates the ball’s position and the line’s endpoint using the current cursor coordinates. The line’s starting point remains fixed, creating the appearance of a ball attached to a leash.
What Programming Language Is Used for Leash CodeHS?
The Leash graphics exercise covered in this guide uses JavaScript with the CodeHS graphics library. Students work with objects such as Circle and Line, along with methods for positioning shapes and detecting mouse movement. Because CodeHS offers different courses, it’s important to confirm the programming environment used in your assignment.
How Do You Make the Ball Follow the Mouse?
To make the ball follow the cursor, register a mouse movement callback using mouseMoveMethod(). Inside the callback, retrieve the mouse coordinates with e.getX() and e.getY(), then pass those values to ball.setPosition(). This updates the Circle’s center whenever the cursor moves inside the graphics canvas.
Why Is My Leash Not Moving in CodeHS?
If the leash doesn’t move, check whether the mouse event handler is registered correctly. You should also confirm that the movement function calls leash.setEndpoint() with the current mouse coordinates. Using the wrong method, misspelling a function name, or failing to register the callback can prevent the line from responding.
What Does setEndpoint() Do in CodeHS?
The setEndpoint(x, y) method changes the ending coordinates of a Line. In the Leash exercise, it allows one end of the line to follow the mouse while the starting point stays fixed at the canvas center. This is what creates the stretching effect as the ball moves around the screen.
Why Does the Leash Start at the Canvas Center?
The canvas center serves as the fixed anchor for the leash. The program calculates this position using getWidth() / 2 and getHeight() / 2. These calculations help the program adapt to different canvas dimensions without relying on fixed coordinate values.
Can I Change the Ball’s Color and Size?
Yes, the Circle’s appearance can be customized. You can change its radius when creating the object and use setColor() to choose another supported color. However, if your CodeHS assignment specifies a particular size or color, follow those instructions before experimenting with alternatives.
Are 9.7.4 Leash and 4.7.4 Leash the Same Exercise?
The two exercise numbers may refer to similar JavaScript graphics activities in different CodeHS course arrangements. However, numbering alone doesn’t guarantee identical requirements. Compare the assignment descriptions, starter code, and expected output before deciding whether a particular solution applies to your course.
Learn more and explore exciting content on: Nemin.io All Free Tools 2026: Features, Benefits, and How to Use Them










Leave a Reply